Good hobbies never ends. Here the progress of my simulation cockpits, thoughts on simulation and earliest experiences.
Newest enry on top.
|
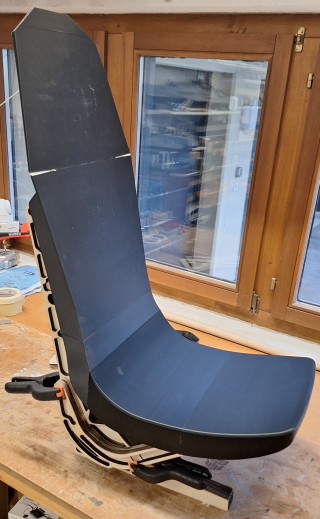
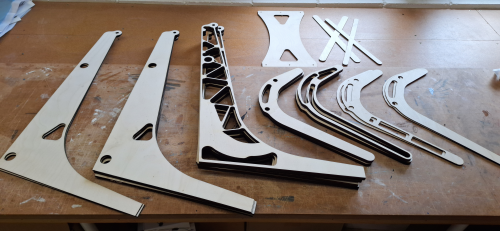
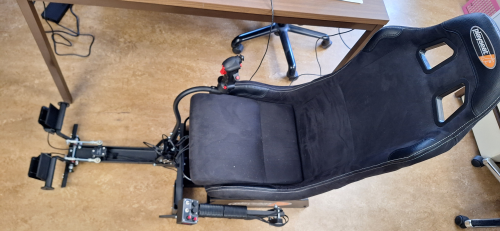
Mar-2024
Building an EC-120 seat for the VR simulator
|

|
|
|
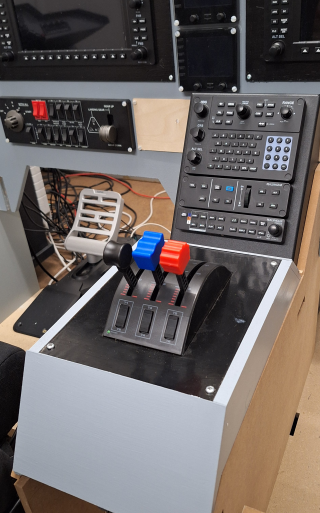
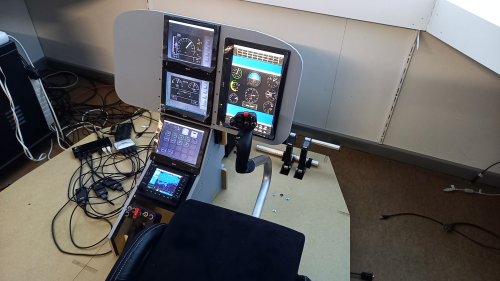
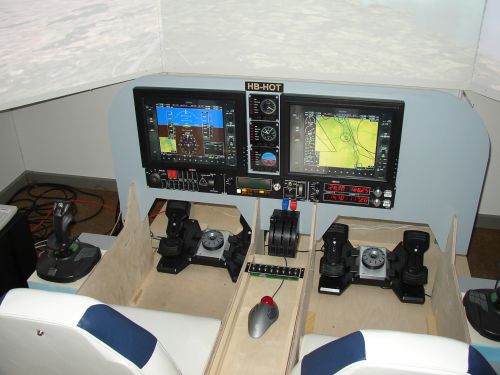
18. February 2024
Middle console changed on the G1000 cockpit and
Realsimgear units GCU479, GFC500 Autopilot, GMA350 Audio Panel added.
|
|
2023
After some flying on an event. A VR unit must be ordered.
Merging with a PlaySeat, voilà!
|
|
|
|
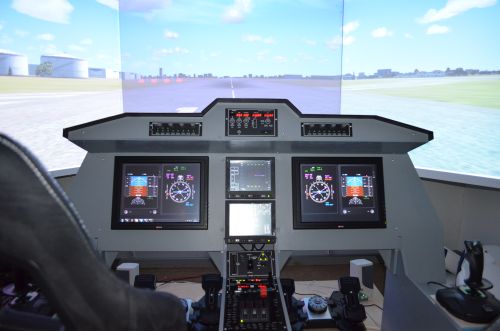
December 2022
Heli cockpit done!
|
|
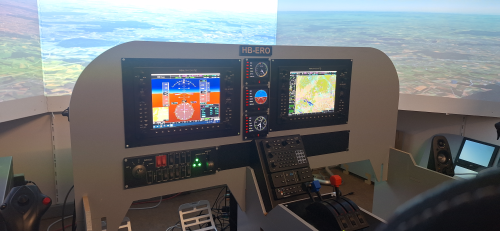
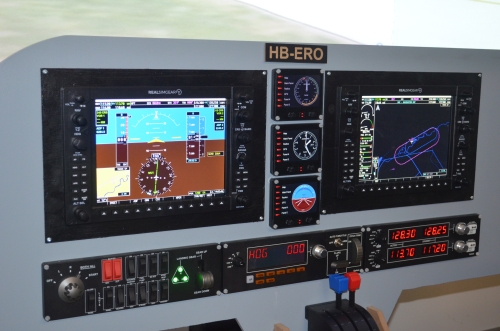
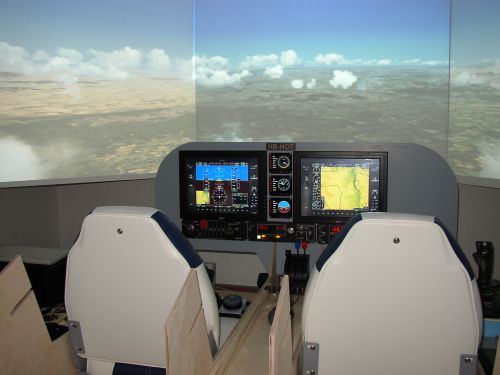
March 2020
Heli cockpit still not built.
But RealSimGear G1000 displays added to G1000 cockpit.
|
|
|

|
21. February 2018
Now also the files for ordering the panels are done.
the panels will be done in wood (MDF) with 12mm thickness
With this it is compatible with the other simulator parts for the planes (modular concept).
But before ordering the parts, I have to find a better room concept to build up the simulator.
My goal is to have two simulators in parallel, connected together by network.
|
|
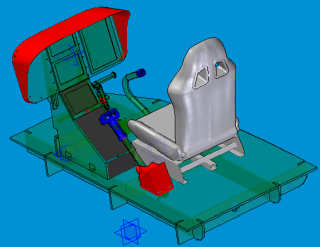
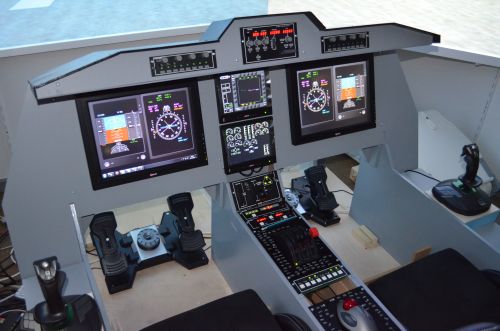
26. January 2018
Construction done!
Unfortunatelly it took me quite a while to construct the heli sim.
Not due to complication in the construction, more due to less time for the hobby.
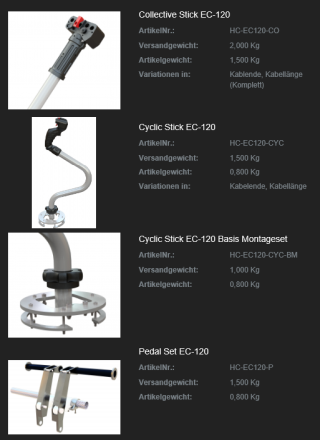
The whole sim is based on a EC-120 layout, but done with standard components
and hence not fully scale.
For me this is not a problem, as I still get all functions available.
Configuration:
| Controls |
EC-120 cyclic stick from microhelis.de
EC-120 collective stick from microhelis.de
EC-120 pedals from microhelis.de
|
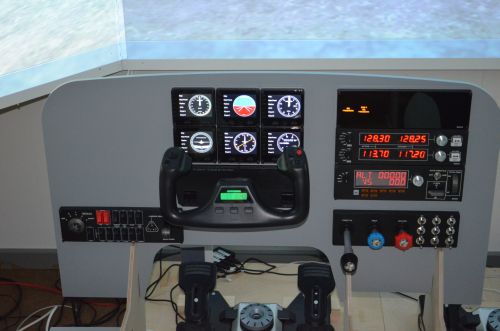
| Panel |
1x 12" touch monitor for instrumentation
2x 8" touch monitor for instrumentation
|
| Center Console |
optional 1x 8" touch monitor for instrumentation
up to 4 large or 8 small goflight panels
|
| Seating |
Playseat Evolution Alcantara with seat slider
|
|
|
|
|
2016
Starting a new simulator for helicopter based on
cyclic stick, collective stick and pedals from microhelis.de
The idea for the cockpit panel is using touch panels and
logitech/saitek and goflight panel elements.
|
|
2014
A generic airliner cockpit panel is added to the modular system.
Panel configuration:
| Autopilot Panel |
GoFlight GF-MCP
2x GoFlight GF-RP48
|
| Center Panel |
Saitek Pro Flight Throttle Quadrant
Logitech Trackman Marble
GoFlight GF-LGT
GoFlight GF-RP48
2x GoFlight GF-166
2x GoFlight GF-P8
|
|
|
|
|
2012
Another cockpit panel is made solely with Saitek instruments.
|
|
December 2010
A second seat, rudder and sidestick are added to the cockpit.
Now it can be flown together with friends as
copilot. |
|
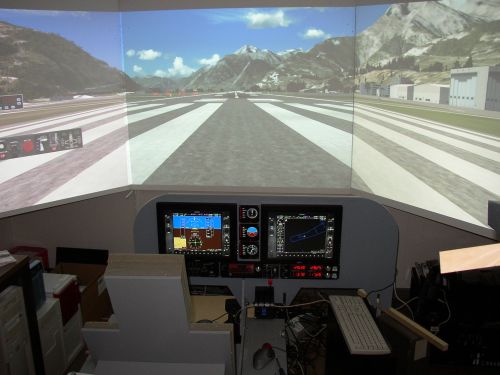 |
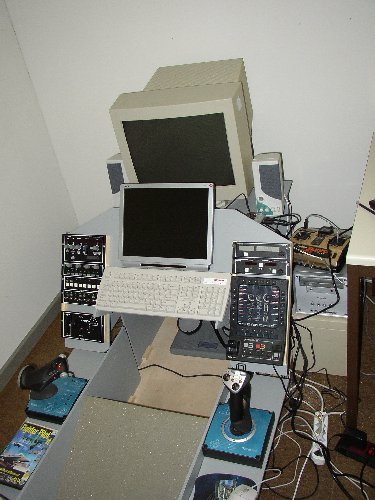
January 2010
A new flight panel was tested at my simulator.
It consists of Saitek panels and two touch monitors to display G1000 panels. |
|
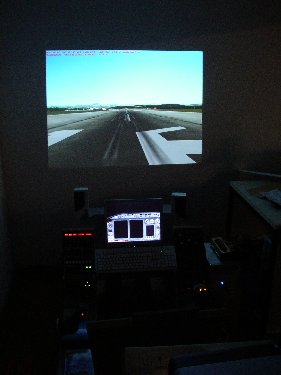
January 2008
Instead of three 19" CRT I installed three DLP-Projector.
|

|
 |
30. June 2007
Tests with Matrox TrippelHead2Go box and a USB-VGA adapter. |
|
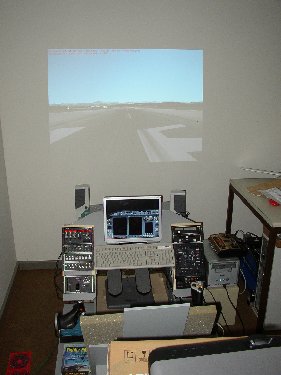
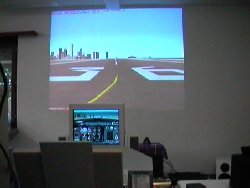
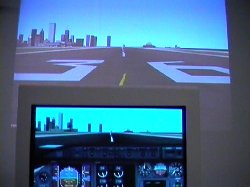
December 2004, January 2005
I purchased a new DLP-projector to show the ouside view. I configured the
flight simulator for two screens (See also Neovember 2004). A special
constuction must be made to put the projector to the top. Unfortunately
the picture is still small. Next I will place the projector more behind to
get more distance (that's the problem with cheap DLP-projectors. They have
not enough zoom). |
 |
 |
November 2004
Some GoFlight modules where installed to make further tests for the next
version of my flight simulator. A second monitor is installed to for
displaying the instrument panel. The monitors runs on a dual head graphic
card. In the near future the CRT monitor is replaced by a video projector. |
|
January 2004
The simulator moved to a new location inside the house. Now it got its own
room. At the moment the simulator reside in one corner of the 3m x 4.5m
sized room. The idea is to use this room for further simulation projects.
The walls are whitened to use them as screen for beamers. |
 |
|
|
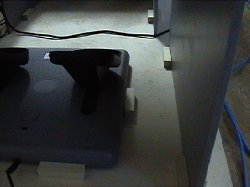
28. December 2002
New base plate made of 9mm thick plywood and the fixation made from 15x15
mm wood.
|
|
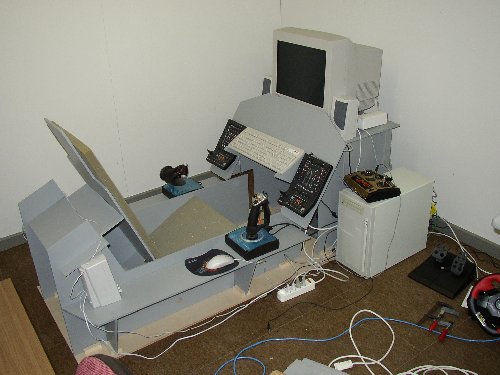
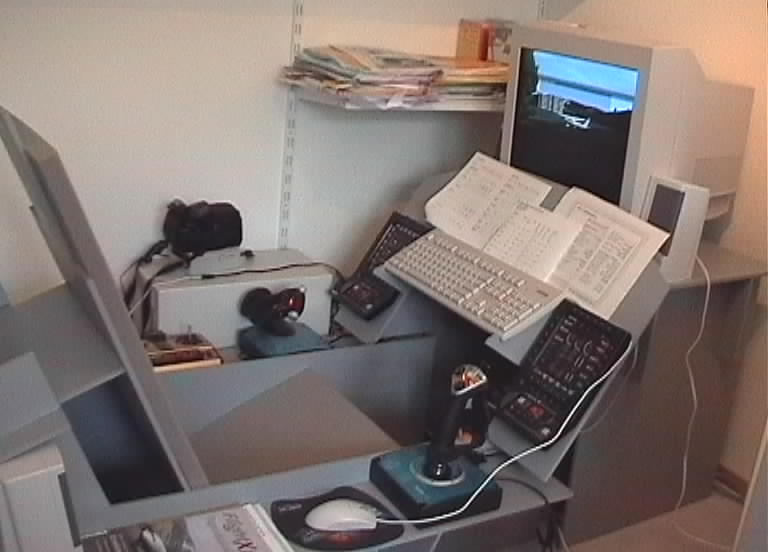
7. September 2002
After moving to a new location. I build up my flight simulator temporarly
(the new room for simulation is not finished yet). As you can see on the
picture, there are new two computers involved. One for the instruments
(master) and one for the outside view on a projector (slave). At the
moment the instrumentation screen is a little bit to big, so I am looking
for a smaller one in TFT LCD technology. |
 |
 |
1. May 2002
After painting and drying the paint, the cockpit is build up again. It is
now finished so far. One thing I have to do is build a better covering for the seat. Now it is not very comfortable and
accurate. During several flights I noticed that the key layout of the
Stick and the panels is not very handy. But for the moment it is enough
and first I have to earn more practice of flying.
I my mind there is already another idea for
building a two seater cockpit. This is what I have learned very
fast. Flying exactly like big birds needs more than two hands. |
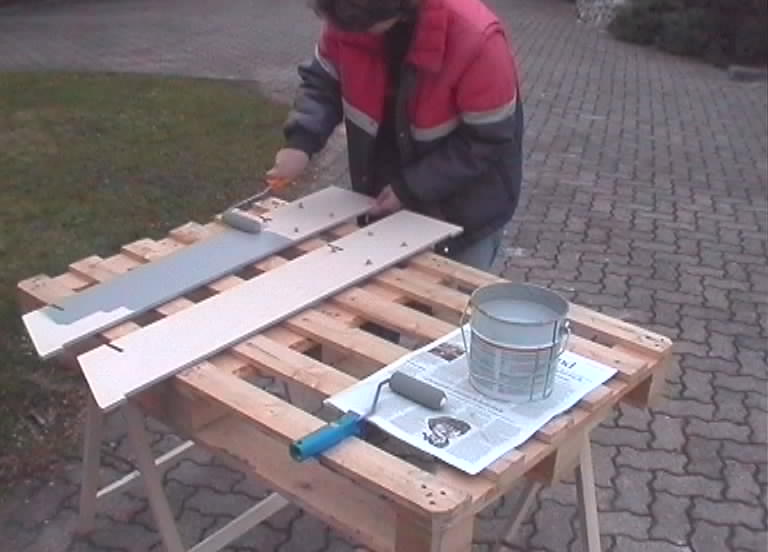
30. March 2002
My girlfriend painting a part of the cockpit. The weather is not the best,
but good enough to paint it. After 3.5 hours all parts are painted twice
on each side. |
|
|
|
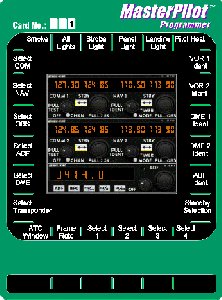
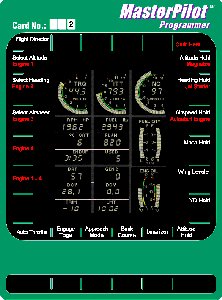
5. March 2002
The MasterPilots and Saitek X-45 are now programmed. I've had several
problems programming the cartridges of the MasterPilot and my self build cartridges
never worked. It seems I've bought the wrong EEPROMs. I've also
made my own Panels for the MasterPilots the left one for communication and
the right one for autopilot and engine. I have programmed both panel
configuration on one cartridge and copied it on a programmer. Game #1 is
for the left panel and game#2 is for the right panel.
So in the next few weeks I check in "real"
conditions if the programming is useful this way.
|
|
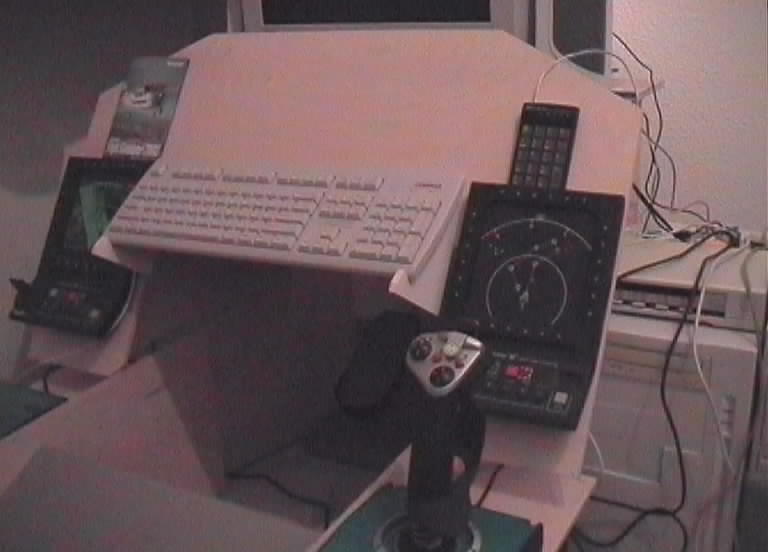
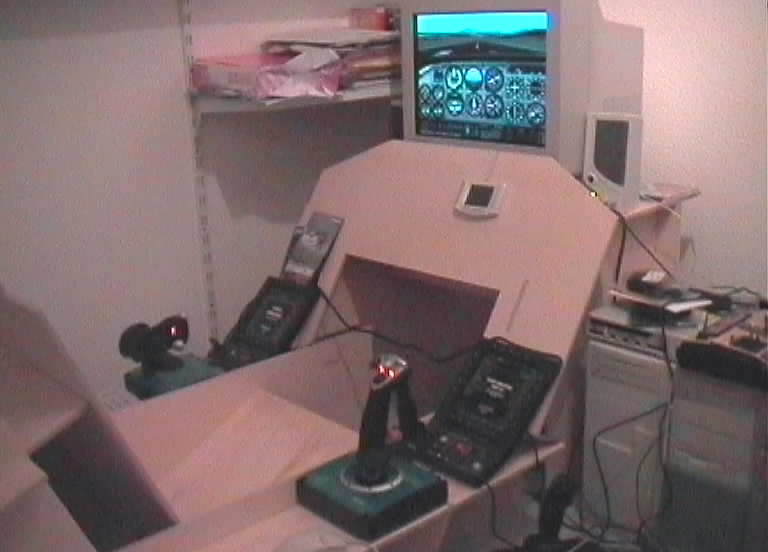
31. January 2002
The PC-Keyboard is placed with two wooden frames between the MasterPilots.
The angels of the keyboard is about 30 degrees.
Parts of the MasterPilot keys and joystick buttons are programmed, but I
have to reorganize it. The goal is to use one key/button layout for all type
of airplanes. The layout will be optimized for Microsoft Flight Simulator
2002 (this is what I am mainly use). Inspired
by an Article of Rob Barendregt seen on FlightSim.com, I reused my old CH Pro Pedals. I made a
special game port cable and can now use my pedals together with the Saitek
Throttle and Stick. The pedals itself can be used as rudder pedals or as
racing car pedals, so I reconfigured it and can now use it as rudder
pedals with differential toe brakes (same as described by the article of
Rob Barendregt). As parking brake switch there is a small push button at
the moment, but this will be changed later with a foot switch. |
|
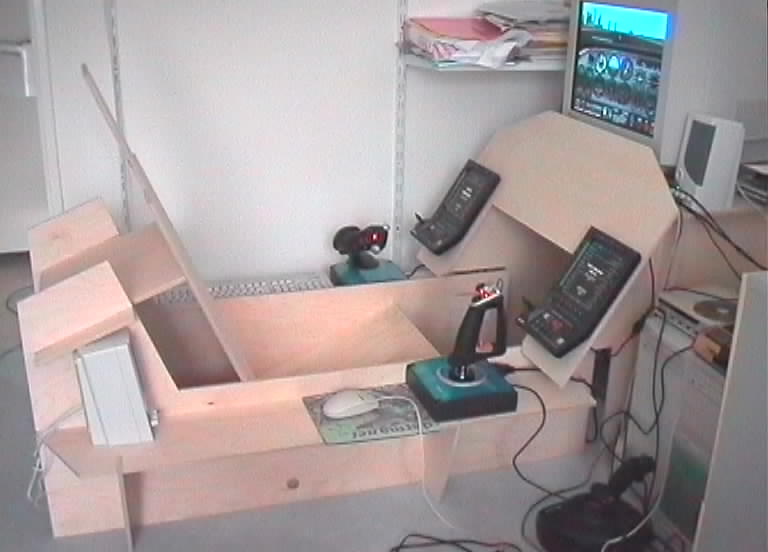 |
9. December 2001
The MasterPilots are mounted a little bit above Throttle and Stick for
better reach.
You can also see the placement of the rear speakers and the mouse.
The keyboard will be placed between the Masterpilots, but for this I have
to design a corresponding keyboard holder.
The Joystick and the Throttle are fixed with four Dowels from below, so
they cannot get out of place.
|
|
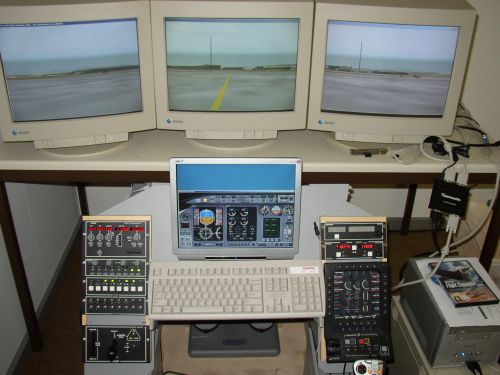
22. November 2001
Not the best shot at the moment, but this is my actual working
configuration. The cable between Throttle and Stick is to short to move it
around the wooden frame, so it crosses the middle of where my legs normally
are. I have to look if I can lengthen the cable or carry it under the
seat.
The picture on the monitor shows FS2002 with the Cessna starting from
Bern/Belp in Switzerland.
On the right side you can see the computers specially for the flight
simulation. one will run the outside view and the second one the
instrument panel. At the moment only one computer is running. The other is
waiting for a monitor, which will be placed underneath the current one
(best fits a slim TFT).
|
 |
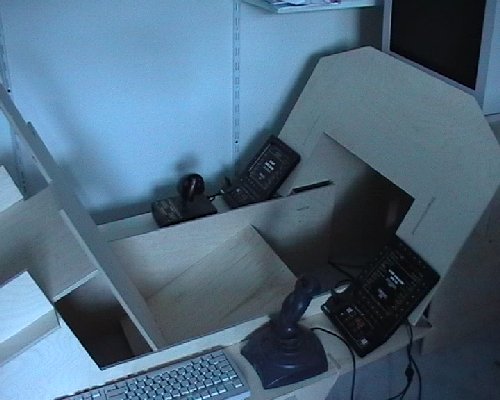 |
After rebuilding it in my study, I try to get the best
position for all components. |
|
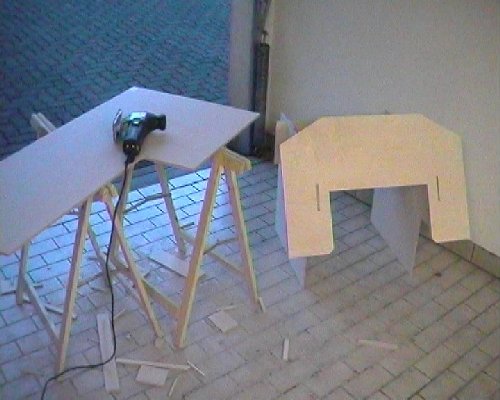
22. September 2001
The result of 3.5 hours of work.
Now lets dismantle the cockpit and clean up the garage!
Next step then is to build it up in my study and try the
best places for the joystick, throttle & Co.
|
 |
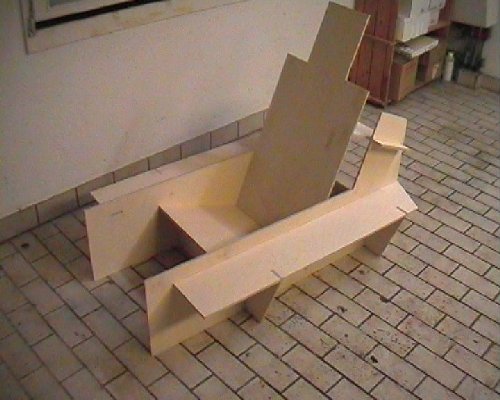 |
22. September 2001
Back part and seat.
|
|
22. September 2001
My working place and the front part.
|
 |
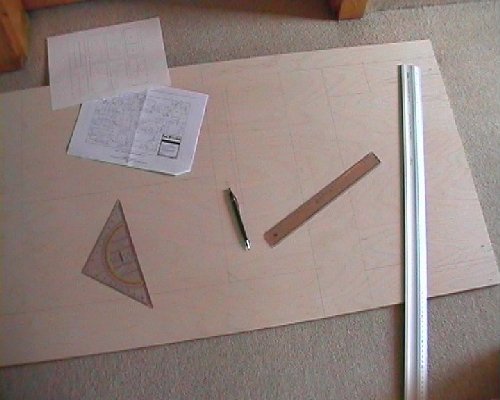 |
15. September 2001
Transfer of the plan from paper to 9mm thick plywood sheets.
|
| 15. September 2001 |
Because of other projects running at work and on my second
hobby RC-Modeling. I am not as fast as I want to build my pit. Today I
have plot the pieces on the plywood, which will be cut out in the next few
days (or weeks). |
| 11. September 2001 |
I've started to build the ABC Mk1 Cockpit by buying the
needed sheets of plywood. |
| March - April 2001 |
I've organized several old computers to build the pit. The
speed of the machines allow only to run FS98 in a quite good manner (Frame
rate about 12 to 17). My goal is to run independent computers for the pit
not using my desktop computers. Next I want to organize some monitors or
LCDs for displaying the panel. As outside view I take my DLP-projector. |
| 14. January 2001 |
Unfortunately I don't have the time to start my cockpit
project. In the mean time I arranged my computers on the desk to build
multi monitor environment. |
| January - August 2000 |
Restart of the Flight Simulator project.
With starting to print the plans for the simulator, I saw that the
simulator is to big for the room I wanted to use, so I had to redesign to
fit
(a) into the room
(b) going through the door
After looking for new ideas on the web I found ABC Mk1 a design of Peter
Akers and Michael Barnes. This one is portable and so go easily through
the doors and can also be transported with a smaller car. So I decided to
use this design to start my project.
On the software side I found FreeFD of Don
Lafontaine which will be use for the panels.
I hope to start the project physically in the next 2 month.
|
| 29. April 1999 |
First drawing about a cockpit is finished. |
| 1993 - 1999 |
Many thoughts about a cockpit but got some problem about the
dimensions, because I wanted to build a generic cockpit. Several other
questions were open like;
- Should I build a one seated or two seated cockpit?
- Should the cockpit look more like an civil or military aircraft?
I found many ideas and hints during my flights in the endless space of the
world wide web and also became useful hints and tips by joining the Simpits group and MicroWings. |
| 17. September 1993 |
During a visit at Disney World, Orlando the feeling of a
motion platform could be enjoyed. After this ride it was clear, if I build
a simulation cockpit it must have a motion platform. |
| 1976 - 1993 |
The ideas about a flight simulation cockpit grow and grow
during this time in my mind. |
| 1976 |
On this date I've had the first contact with a flight
simulator. It was during shopping in our mall, were a little exhibition
about private pilots showed a simulator for small aircrafts. I was one of
the lucky winner and could do my first take off and landing (with a little
help of an instructor). After this short 10 minute flight I had wet hands,
but it was WOWWWW!!!!!!!! This was the trigger of the idea about a flight
simulator. |